
If you really want to make a friend, go to someone’s house and eat with him… The people who give you their food give you their heart. — Cesar Chavez
Since I’ve finally published my memoir and wrote in my About the Author page “…to get Bob’s recipes for ‘the best fried catfish in St. Louis’ and Korean pickled watermelon rind… visit his ‘homemade and dated’ website…” I’d better have those recipes accessible. So here they are.
This is only a beginning. My plan is to eventually begin publishing a food story and/or a recipe once a week on my Food page.
Many years ago, I wrote a food column titled Food for Thought for the University Times in Auckland, New Zealand and I believe I am up to the task. For now, I’ll start with catfish and kimchee.
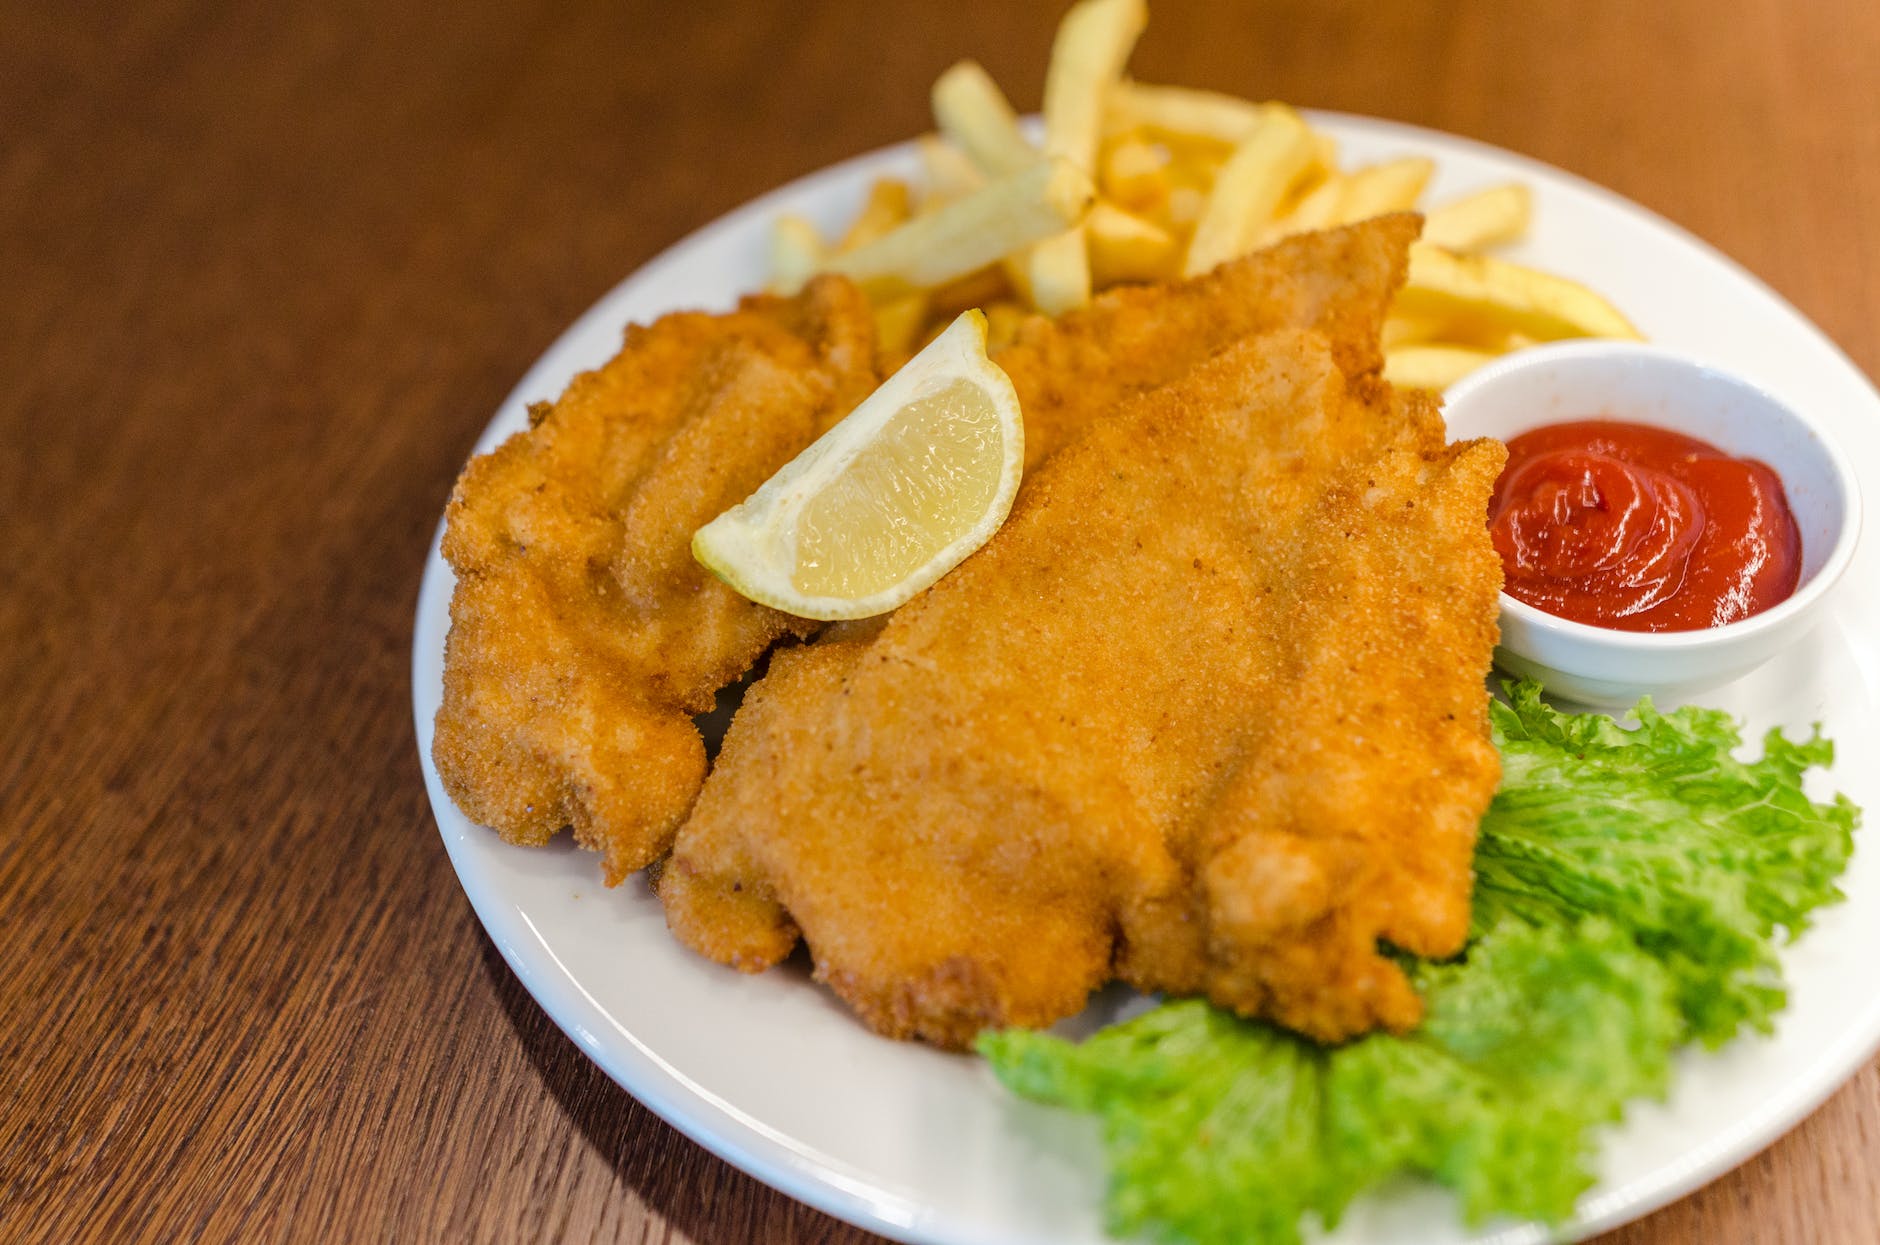
The Best Fried Catfish in St. Louis
You’ll understand the title above once you’ve read my memoir.
Ingredients:
6 medium size Catfish fillets (or equivalent)
Cooking oil
Coating:
½ Tbsp garlic powder
½ Tbsp onion powder
1 tsp black pepper
1 tsp paprika
1 tsp salt
1 ½ C plain breadcrumbs
1 ½ C corn meal
Dipping batter
½ C white flour
½ C water
Equipment:
Mixing bowls
Metal cooking pan large enough to hold two fish fillets, or electric deep fryer
Slotted metal spatula or similar utensil
High temperature food thermometer
Cooling rack
Procedure:
Begin by placing enough cooking oil into pan so fillets will be submerged. Set burner to low to begin slowly heating oil while assembling ingredients. Check heating oil occasionally and keep temperature below 300F until ready to cook fish. If using electric deep fryer place oil in fryer and set to 365F.
Add all dry ingredients except flour into medium sized bowl and mix.
Add water and flour into separate bowl and mix with wire whisk until blended. Mixture should be consistency of thin paste.
Now check oil heat and turn up temperature until oil is at 375F.
Dip fish fillet into wet flour mixture and coat fillet thoroughly. Then dip coated fillet into dry coating. Using clean hand and a spoon, cover fillet with cornmeal mixture. Remove and set aside. Now coat additional fillet.
Carefully place fillets into hot oil with metal spatula or similar and cook until fillets float to top.
Remove cooked fillets and place on cooling rack. Continue procedure with additional fillets if required.
Notes:
Coating – Experiment with different spices. “Old Bay”, cayenne pepper, etc. You can mix the coating with some of the batter, deep fry that, and see if you like the taste. You can also make a large batch of coating and store it for future use. (Important! Do not store leftover coating that you’ve used to batter fish. Unless it’s stored in the refrigerator and used within a couple of days.) I mix leftover batter and coating together, add a little baking powder and make hushpuppies.
Batter – Some people add hot sauce or other flavorings. Instead of wheat flour, I now often use chickpea flour. Furthermore, don’t pre-batter too many fish. The batter gets soggy and doesn’t fry well.
Oil – Use oil that has a high smoking point. Soy, vegetable, canola, etc. After using, let the oil cool, then strain, and reuse for deep frying. Overheating the oil reduces its usefulness.
Temperature – The ideal temperature for deep frying fish is usually around 360F. Thin fillets can often be cooked at a lower temperature. Ratio of fish to oil can also affect temperature. For example, if you fry too many fish in a small pan, the oil will cool down quickly and not cook properly.
Cooling rack – Ideally, don’t drain cooked fish on paper towels. A cooling rack or frying basket works best. However, for best practices and marital bliss, make sure you thoroughly wash the rack after use, or even better, have a dedicated “fried food” cooling rack.
That’s about it.
Enjoy
The Way of Kimchee
According to so called “cult expert” Mia Donovan, in a Refinery 29 article, “They, [Unification Church members] were sleeping in vans and not really eating.” When we did eat, it was only mush, according to what Vincent Bugliosi wrote in the afterword to his book, Helter Skelter.
Since I never did cook mush while I was the team cook in one of those vans, and I and everyone else ate just fine, I’d like to know where they got their information. Perhaps later, I’ll challenge those assumptions in a blog post titled, The Way of Mush. But for now, my focus is kimchee.
In the early eighties, I was at a Korean restaurant ordering lunch after delivering seafood to Japanese restaurants throughout Atlanta, Georgia.
“I’d like the kimchee soup.”
“Order something else. White people no like. Too spicy,” the Korean waitress responded. “Try Bulgogi.”
“I know it’s spicy. That’s why I ordered it. I have a bad cold.”
“Okay, I warned you.”
As I ate the soup, my eyes started watering, I began to sweat, and my sinuses cleared.
“See. Too spicy.”
I countered, “Tongil Gyo,” saying the Korean name for the Unification Church.
“Tongil Gyo? Oh…you know ‘bout kimchee.”
Many years later, in 2018, while travelling throughout New Zealand promoting my wife’s memoir “Free Maree”, www.Freemaree.com I decided to make kimchee for our hosts. In Dunedin, at an Asian market, I asked a young man if they had gochugaru (Korean pepper powder). He stared at me dumbfounded.
“Wow. A white person has never asked me for that. It’s in the next aisle behind you.”
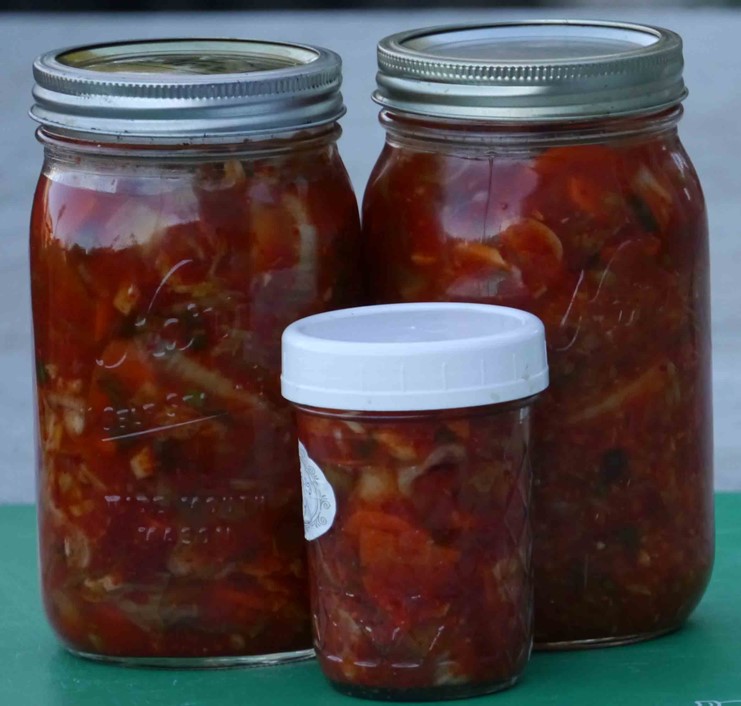
Throughout the years, usually, there’s been a jar of kimchee sitting in our refrigerator. Sometimes homemade, but usually store-bought from an Asian market. Although I’ve made kimchee in the past, I often found it hard to get the proper ingredients and many recipes difficult to duplicate. Therefore, I came up with my own recipe and kimchee-making procedure. It’s easy, works great, and (usually) delicious. (My curried and carrot peel kimchee tasted terrible.)
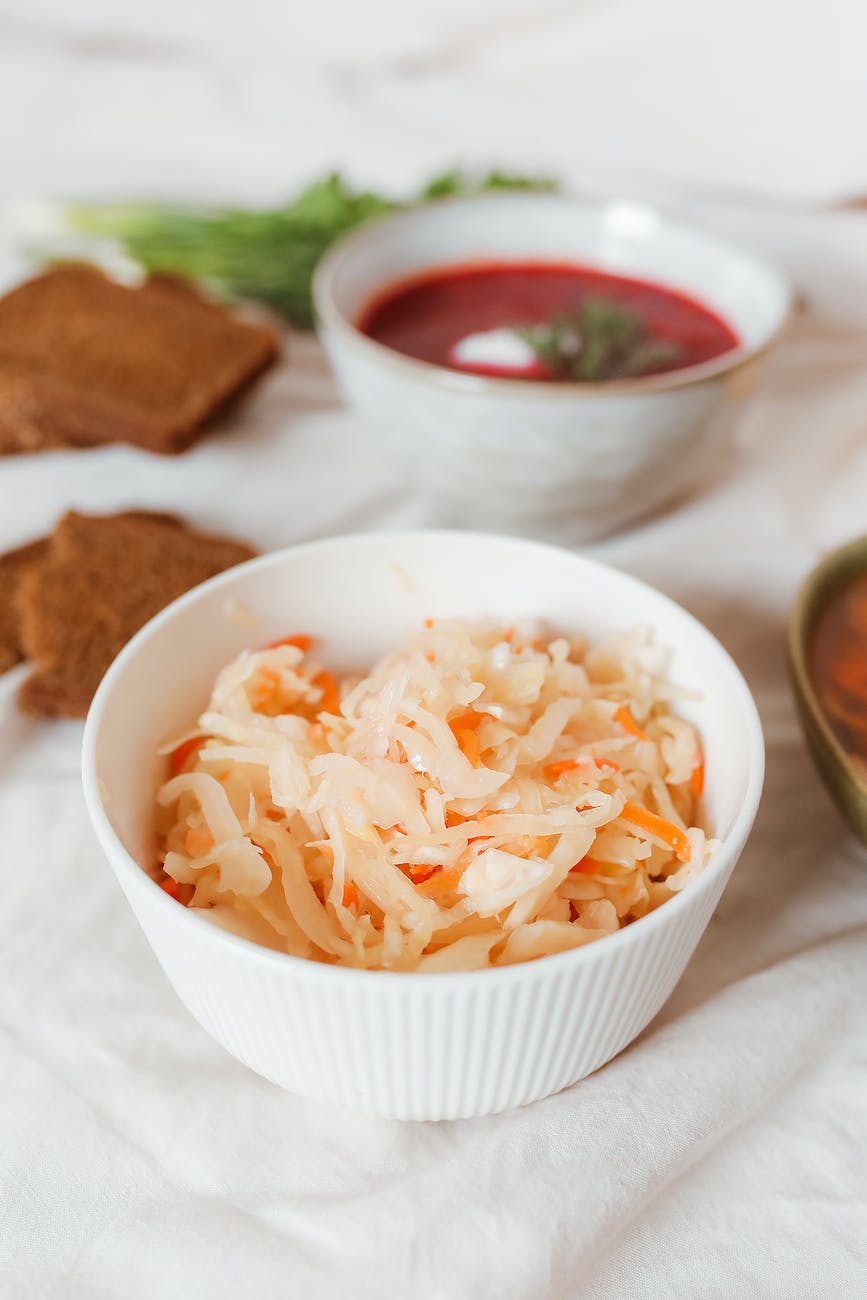
I call kimchee Korean sauerkraut, and the main difference between the two is flavoring. While traditional sauerkraut rarely has added flavorings, kimchee may contain garlic, pepper, gochugaru, onions, ginger, fish sauce, oysters, beef broth, miso, shrimp, seaweed, scallions, or other “secret” ingredients.
Equipment:
Thankfully, kimchee can be made without any special equipment.
Stainless steel, glass, ceramic and even plastic mixing bowls work fine. (For large amounts of kimchee, I’ve used recycled five-gallon plastic pickle buckets) Likewise, use stainless steel and plastic utensils. Stay away from reactive metals like copper and aluminum.
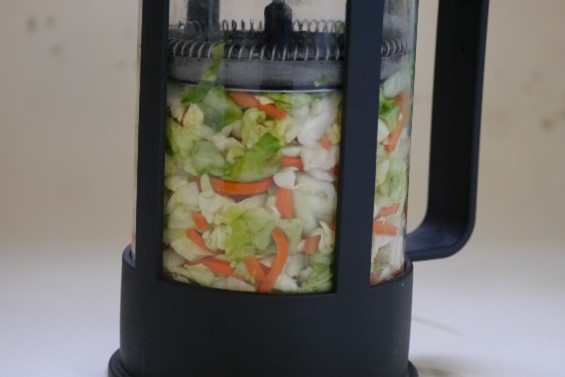
For fermenting your kimchee you’ll need some glass jars. I use Mason jars, or one-gallon glass jars my son acquired from the local bar and grill where he worked. For a while I used our French press coffee maker until my son complained about the coffee tasting like cabbage. A press dedicated to kimchee-making might be a good idea. You can also use food grade plastic tubs.

For lids, if you’re using Mason jars, make sure the lid insert has a plastic coating. You can also buy special plastic lids, lid inserts, or use plastic wrap.
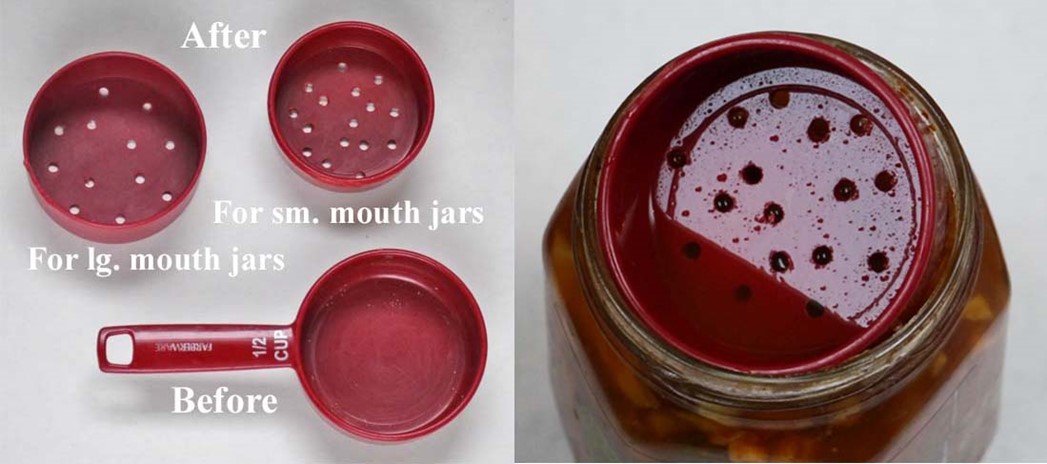
I also butchered and modified some plastic measuring cups I use to keep the fermenting vegetables suspended below the liquid. (Patent not pending.)
Air locks: Some people use air locks, which allows gasses to escape from the fermenting vegetables without letting oxygen in. I’ve never used them. Here’s an excellent article on the subject: Air Locks
Ingredients:
Salt – Himalayan Pink Salt, Celtic Sea Salt, Kosher salt, or salt gathered by dancing fairies on an enchanted island should work fine. Personally, I use regular non-iodized table salt. (If using larger grained salt, measure by weight.) Tip: If you’re going to do a lot of pickling, purchase salt in bulk from a restaurant supplier.
Water – I use filtered water that’s free of chlorine.
Vegetables:
Cabbage – Although Napa cabbage is often the primary vegetable used to make kimchee, in some areas it can be hard to find and a little pricy. Standard round, (I call it Anglo cabbage) and other cabbages can also be used.
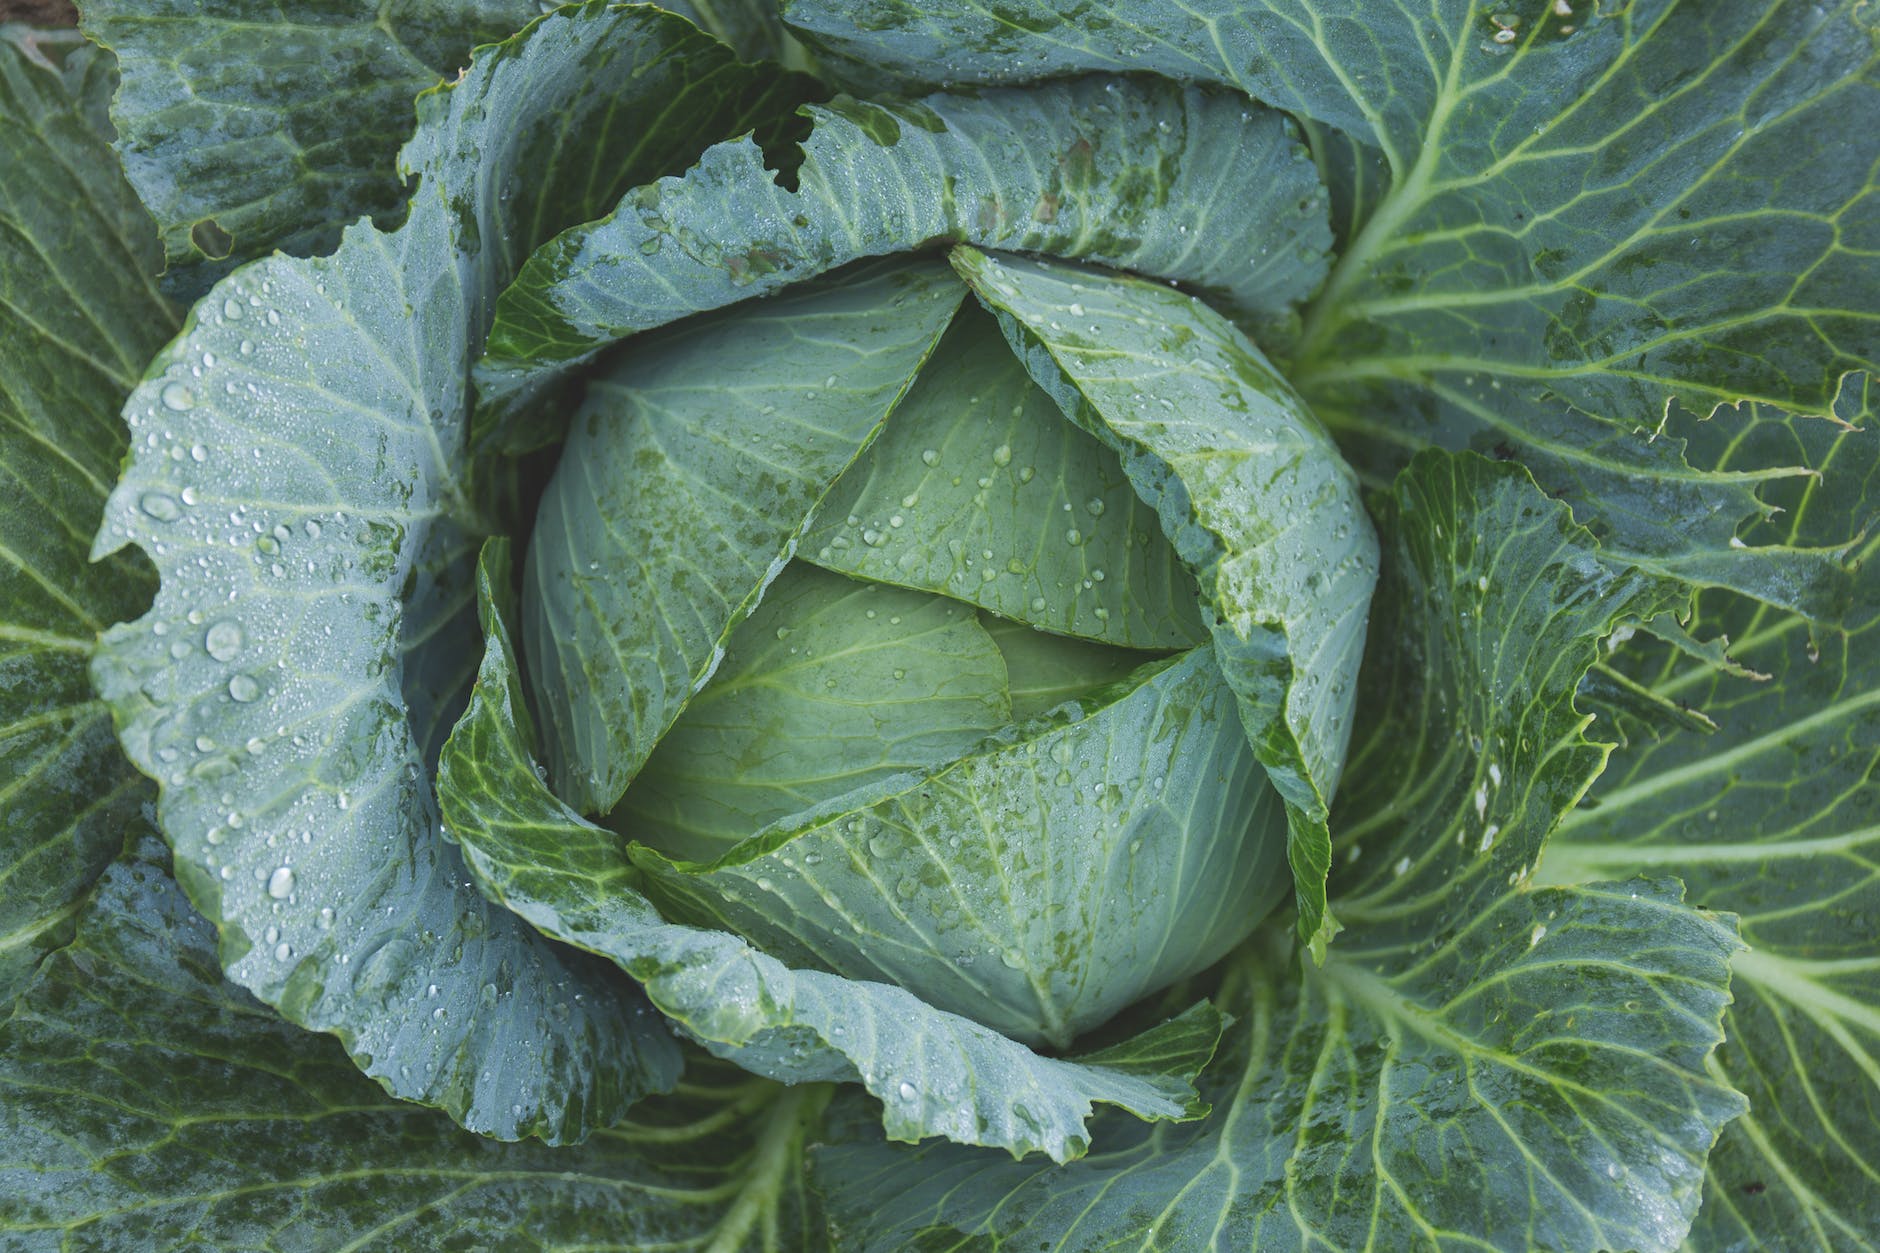
For super-quick and easy kimchee use pre-shredded cabbage.
Carrots – Standard or baby carrots work fine. I’ve read where the sugars in carrots may affect fermentation so limit their use.
Cauliflower – Use all the cauliflower, including leaves and stem.
Celery – Pretty straightforward. Again, use everything, including leaves.
Cucumbers – Asian cucumbers with thin skins work great. Other cucumbers can also be used. If you can eat it raw with the skin on, and it tastes okay, leave the skin on, if not, peel.
Green tomatoes – When a friend gave me some green tomatoes. I sliced them into small slices and combined them with other vegetables for kimchee. Tasted great.
Leafy greens – One summer I worked at a resort in Northern California. While walking past a compost pile, I saw a large pile of discarded Romaine lettuce cores and wondered if they would be good for kimchee. The next time I made kimchee, I added sliced Romaine cores, and it was good.
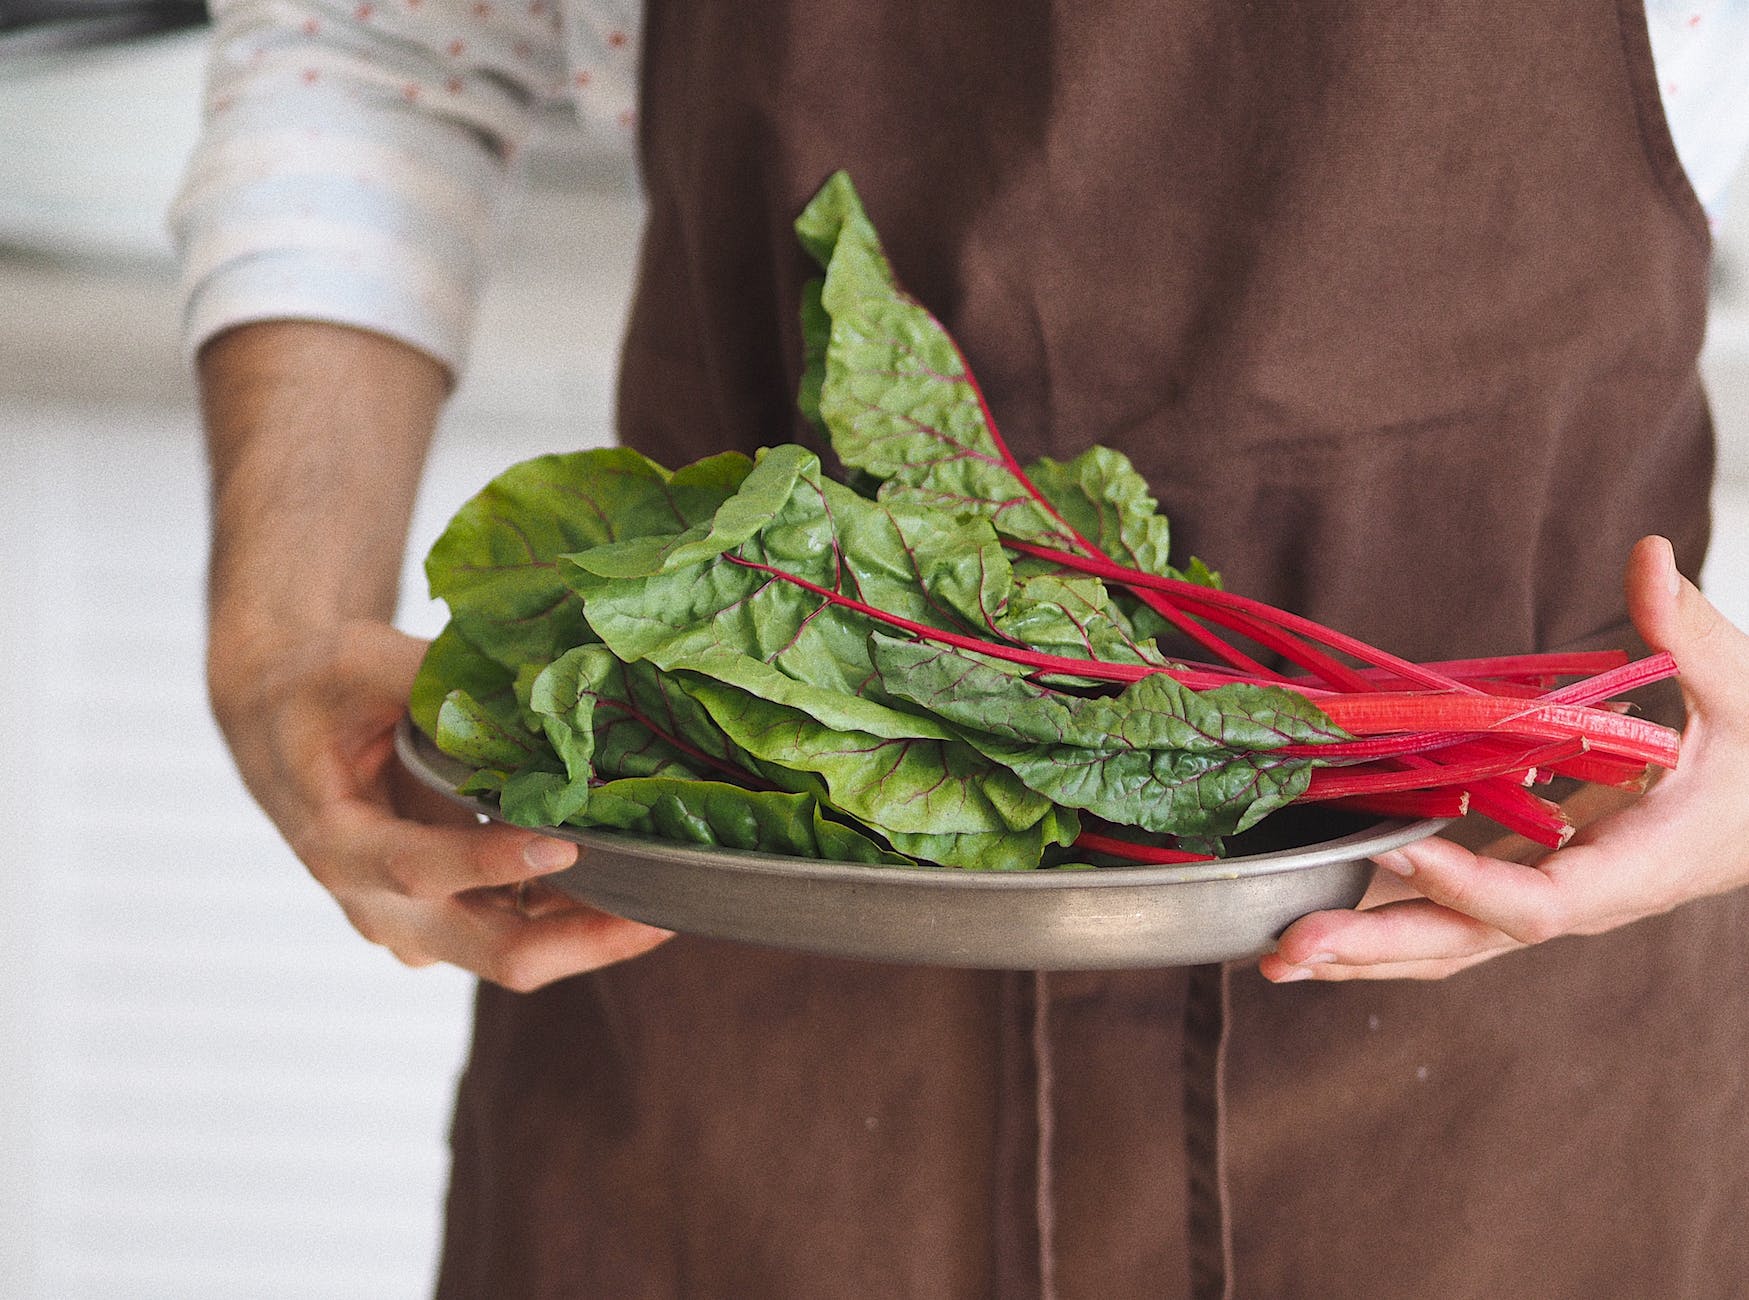
Swiss chard works well, as does spinach. Although, some of the lighter greens tend to almost disintegrate.
Onions–Green onions (scallions) are almost always used in kimchee. Other types work well too.
Pickled garlic – After a fellow kimchee aficionado, who had just returned from Korea, told me about the kimchee with whole garlic cloves he had enjoyed, I tried using raw whole garlic cloves, but it didn’t turn out well. Then I decided to pickle the garlic first. That works well.
There are many recipes for Korean pickled garlic online.
Pickled Lemon – I pickled a small bag of lemons someone gave me. I wanted more and asked for lemons around the neighborhood. Lemons started arriving in bags on the front porch. Soon I had too many lemons! The recipe I previously used was too time-consuming. Here’s what I did:

Gather lemons and rinse. Cut off ends with stem. Slice lemons into sections and place one layer into non-reactive container. Sprinkle salt onto lemons and continue layering lemons/salt until container is full. User about one cup of salt to gallon of lemons. Let sit for a few hours. Smash lemons to release juice. Once salty juice is covering lemons, place a weighted plate on top of lemons. (If there’s not enough juice to cover lemons, add water.) Don’t refrigerate. Daily check on lemons and stir with non-reactive spoon or paddle. After a few days put into smaller containers with salty liquid and refrigerate. That’s it. Will keep for months or perhaps longer.
Use as is or place in water to help remove excess saltiness. Add to salads, in Moroccan cuisine and various recipes. I once made a tasty chutney for lamb with pickled lemons, cranberries, onions, sugar, and other ingredients. Great in watermelon salsa. I also like to remove seeds from the preserved lemons then lightly puree the lemons and use as a seasoning or spread. Great in sushi or fish sandwiches. I call it le-mon-naa-duh, like tapenade the pureed olive spread.
Radish–There are many types of radishes. From small round red radishes to large Daikon. Most of them should work fine. You can even include the radish greens.
Summer Squash–Great way to use up that excess zucchini. Young squash is usually best, but I’ve had decent results with mature pieces. Yellow squash also works. Personally, I haven’t used other types.
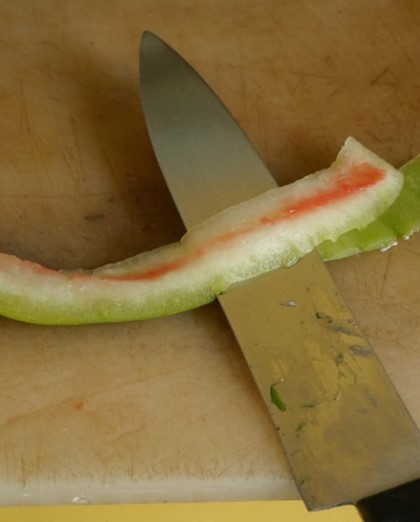
Watermelon Rind–During summertime I use a lot of watermelon for smoothies, gazpacho, and salsa. The rind also works well for kimchee. I freeze the rind to soften the flesh. Defrost when ready to use, then fillet the skin from the fleshy part. (I used to fillet fish for a living, so that part’s easy for me.) May take some practice, but it’s worth it.
Hint:
Add kimcheed or non-kimcheed rind to soups or stir-fries and see if anyone can guess the “secret vegetable”. You can also cut peeled and unfrozen watermelon rind into bite-sized pieces and pickle it like garlic.
Other Vegetables:
Although I haven’t tried it, I read where broccoli doesn’t work well. If you’re not sure about using a particular vegetable, simply make a small batch. If it doesn’t kimchee (I think it should also be a verb) well, cook it in a stir-fry or soup.
Primary Flavorings:
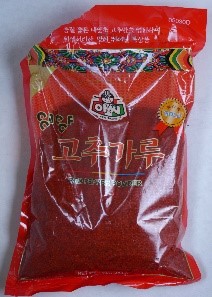
Red Pepper Powder– (Gochugaru) With the advent of Amazon, this is fairly easy to acquire (at least in the US). In a pinch I’ve used chili powder, dried guajillo peppers and red pepper flakes. (Soak guajillo peppers in boiled water for about twenty minutes to soften.)
Garlic–Sliced raw whole cloves. I buy pre-peeled garlic in bulk for pickling and kimchee. In a pinch I’ve even used granulated garlic. I’ve also used garlic puree I purchased at an Indian store.
Ginger–Peeled and chopped fresh ginger is best. I’ve also used ginger puree purchased at an Indian store.
Additional Flavorings:
As mentioned earlier, you can add a multitude of additional flavors to your kimchee: Fish sauce, oysters, small shrimp, miso, seaweed, applesauce, etc. Our recipe will only use the primary flavorings. Add additional flavors if desired.
Procedure to make one quart of basic kimchee:
Don’t worry too much about following this recipe to the letter. Making kimchee isn’t an exact science. However, make sure all your utensils, jars, and working surfaces are thoroughly cleaned with hot soapy water and rinsed.
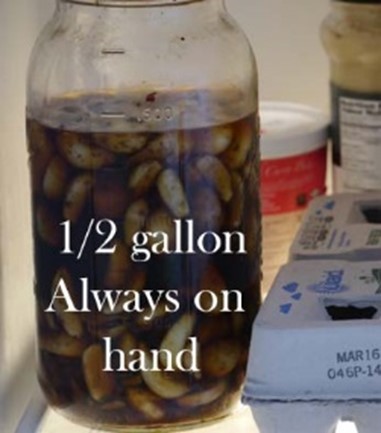
Dissolve ¼ cup salt with one quart of warm water. Set aside. (I always have a gallon of salty water on hand for kimchee. Use one cup salt to a gallon of water.)
Slice around a quart and a half of washed chosen vegetables, into bite-sized pieces and place into mixing bowl. Cover with salted water that was set aside. Stir mixture occasionally throughout the day or place weighted plate over vegetables to submerge in brine. After a few hours of soaking, vegetables are usually ready for flavoring to be added. However, I always let the vegetables sit overnight unrefrigerated.

Tip:
Keep a jar of brine in refrigerator and add leftover raw vegetables to the brine until you have enough for a batch of kimchee. (As an experiment, I made kimchee out of vegetables that had been soaking in salt brine for two months. It turned out well.)
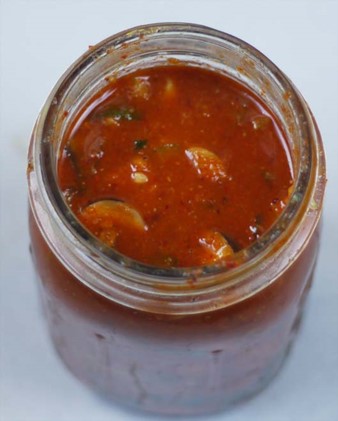
After brined vegetables have sat for the required time, drain and rinse. Place vegetables in mixing bowl and add: ½ cup water, 2 tablespoons sugar, ¼ cup gochugaru, ¼ cup peeled and sliced fresh garlic, ¼ cup peeled and chopped fresh ginger and ¼ cup sliced green onions. (Amounts are only suggestions. Adjust according to taste.)
Mix all ingredients together then pack loosely into quart jar. Leave about an inch of vegetables below jar rim. Pour liquid from mixing bowl over vegetables in jar until covered. If short of liquid, simply add water. (If you have too many vegetables use in a stir-fry or other dish.)
I then place the plastic strainer I created over vegetables to keep vegetables submerged. However, I’ve made kimchee for years without using the strainer with decent results. Now place lid on jar.
If not using an air lock, you’ll need to burp the jar occasionally. Simply loosen lid to let gas escape. Occasionally check kimchee to see if it’s fermented to your liking. If it is, place jar in refrigerator to slow down fermentation. (It’s usually a good idea to set jar inside bowl or similar container to catch juices that might spill over.)
(Fermentation occurs faster in a warm environment. If you want a batch of kimchee quickly, let it sit at room temperature on the countertop. If you’ll be needing it later, place directly into refrigerator but remove to room temperature to speed up fermentation.)
Smaller pieces of vegetables will also absorb the salt brine quicker and can help make a faster kimchee.
In a few days, your kimchee should be ready for use. Check out the numerous uses for kimchee online.
Variations:
Once you’ve made your first batch of basic kimchee successfully, you might want to try out different methods and ingredients. I like to take about of a quarter of the vegetables and add some applesauce or a peeled apple and puree that mixture in a blender. I then add that puree to the kimchee vegetables.
I’ve already listed the different ingredients others use in their kimchee. Try some of those and see how you like it.
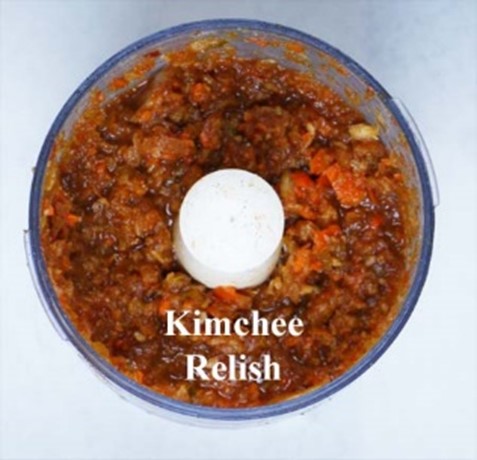
You can also make a relish. Simply add kimchee to a food processor and pulse to desired consistency. (I often use watermelon rind kimchee for this.) Throw in some Sriracha sauce, horseradish, mayonnaise, peanut butter or even some ketchup. Who knows what new taste sensations you might discover?
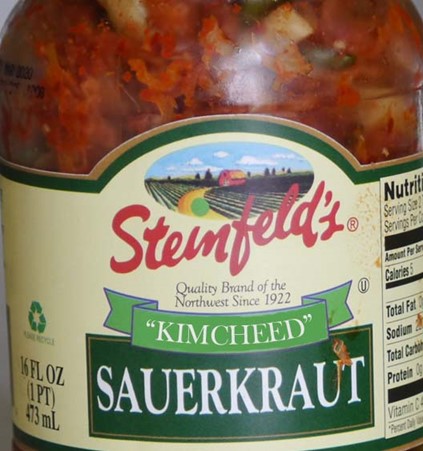
For example, after I was comparing sauerkraut and kimchee I wondered if I could make the German counterpart more interesting. After I bought a jar of sauerkraut, I drained it then added garlic/ginger paste, red pepper powder, sliced pickled garlic, a little sugar, sliced scallions and sesame seeds. I think I added too much pepper powder, but there’s potential. Once I’ve created a palatable product, I might have to contact Steinfeld’s and other sauerkraut producers. (Remember you saw it here first.)
I sincerely hope you’ve found this Way of Kimchee article helpful and a guide for you on your kimchee odyssey. Please share your experience with new methods or ingredients.
*Spelled kimchi, kimchee or Kim Chee.
LA Times article about the spelling controversy: Kimchee or kimchi?